
A bathroom should not become harder to use as your needs change. The best bathroom accessibility upgrades make everyday routines safer and more comfortable without making the room feel clinical or sacrificing the style you want in your home. With the right planning, an accessible bathroom can look polished, feel spacious, and support independence for years to come.
For many homeowners, the decision starts with a practical concern: a slippery tub wall, a narrow doorway, poor lighting, or a layout that no longer works as comfortably as it once did. Addressing those issues during a planned remodel is often more effective – and more cost-conscious – than making temporary fixes later.
Start With the Layout, Not the Accessories
The most useful accessibility improvements are built into the room’s layout. A beautifully selected grab bar or shower seat can help, but neither solves a bathroom that is too tight to move through safely.
Before choosing finishes, consider how people enter, turn, and use each fixture. Doorways should allow comfortable passage, especially for anyone who uses a walker or may need one in the future. A pocket door or outswing door can free up valuable floor space in a compact bathroom, although it may require changes to framing, plumbing, or electrical work.
Clear floor space around the toilet, vanity, and shower matters just as much. This does not always mean creating a large, fully barrier-free bathroom. It means designing for the people who live in the home now while allowing room for changing needs. A contractor can help identify where a few inches of clearance, a revised fixture location, or a different door configuration will make a noticeable difference.
Best Bathroom Accessibility Upgrades to Prioritize
1. Replace a high tub wall with a curbless shower
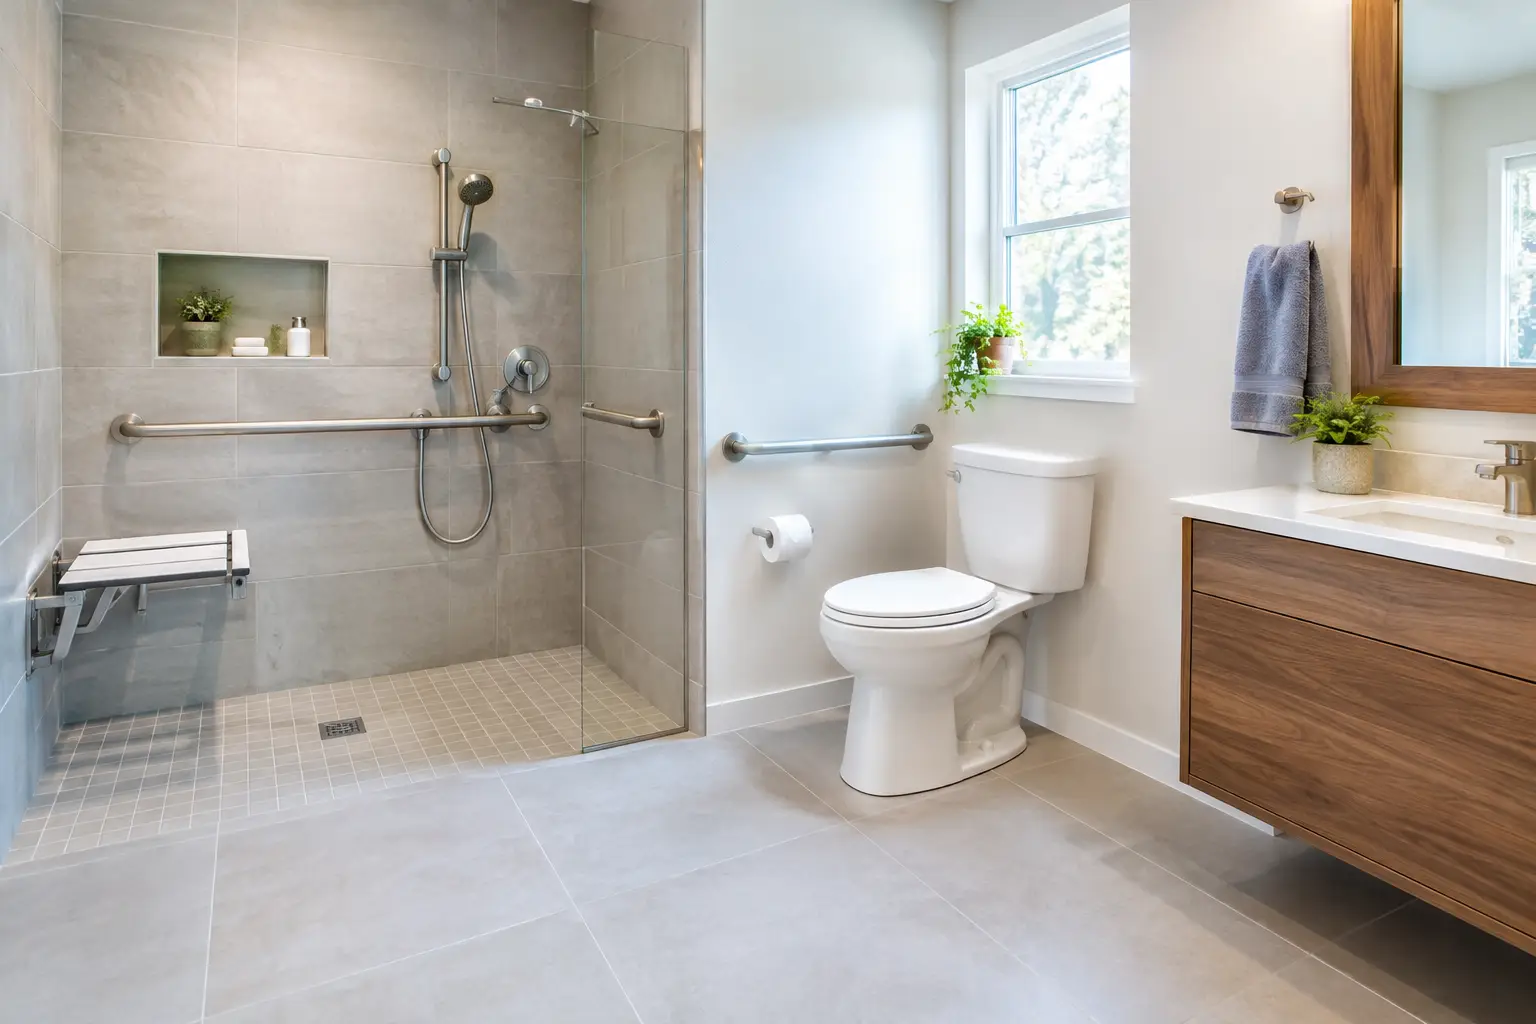
A curbless or low-threshold shower is one of the most impactful upgrades for safety and daily convenience. Stepping over the side of a traditional tub is a common source of falls, particularly when water, soap, and limited balance are involved. A shower floor that transitions smoothly from the bathroom floor reduces that risk and creates a clean, modern look.
Proper installation is critical. The shower floor must be correctly sloped to direct water to the drain, and waterproofing beneath the tile must be handled with care. In some homes, creating a true curbless entry requires adjusting the subfloor or drain location. That added work can affect the budget, but it is often worthwhile when long-term accessibility is a priority.
For added comfort, include a handheld showerhead and a fixed showerhead. This combination works well for seated bathing, helping children, cleaning the shower, and everyday use by the entire household.
2. Install well-placed grab bars with structural support
Grab bars are no longer limited to institutional-looking designs. Today, they are available in finishes and styles that coordinate with faucets, towel bars, and other bathroom hardware. The key is proper placement and secure mounting.
A grab bar should be fastened into wall blocking or studs, not simply attached to drywall. Ideally, blocking is installed during the remodeling process in the shower, beside the toilet, and near the tub or shower entry. Even if you do not need grab bars immediately, adding blocking now makes future installation simple and protects your walls from later repairs.
Do not confuse a towel bar with a grab bar. They may look similar, but a towel bar is not designed to hold a person’s weight.
3. Add a built-in shower seat
A built-in shower bench offers a stable place to sit while bathing, shaving, or simply taking a break. It is especially helpful in a walk-in shower and can be designed to match the shower tile for a custom, finished appearance.
In a smaller shower, a folding wall-mounted seat may preserve more standing room. The best choice depends on available space and how the shower will be used. A fixed bench feels substantial and adds convenience, while a folding seat offers flexibility in a tighter footprint. Both need strong wall support and thoughtful placement away from the main spray zone when possible.
4. Choose slip-resistant flooring
Flooring has a major influence on bathroom safety. Smooth polished tile may look impressive in a showroom, but it can become slick when wet. Look for tile with a matte or textured finish that provides more traction while remaining easy to clean.
Smaller tile can also be a smart choice inside a shower because additional grout lines create more grip underfoot. Outside the shower, larger-format tile can still work well if you select the right finish. The goal is not a rough surface that is difficult to maintain. It is a durable floor that gives homeowners more confidence when moving through a wet area.
Avoid relying on loose bath mats as the primary solution. Mats can shift, curl at the edges, and create another tripping hazard. If you use them, select low-profile options with secure backing and keep the surrounding floor dry.
5. Improve lighting at every task area
Shadows and glare can make a bathroom difficult to navigate, even for someone with otherwise good mobility. A single ceiling fixture rarely provides enough light for safe grooming, showering, and nighttime use.
A better plan includes overhead lighting, even illumination at the vanity, and a dedicated light in the shower. Sconces or vertical vanity lights placed at face level reduce shadows more effectively than a light mounted only above the mirror. Dimmers allow the room to feel comfortable at night, while a motion-sensor night light can provide gentle guidance without waking the whole household.
Choose fixtures that are rated for damp or wet locations where required. Proper lighting is a relatively straightforward upgrade, but it has an outsized effect on visibility and confidence.
6. Select an accessible vanity and faucet
A standard vanity can create unnecessary strain if it is too low, too deep, or difficult to use from a seated position. Depending on the household’s needs, consider a wall-mounted vanity, a cabinet with knee clearance, or a counter height that is comfortable for the primary users.
Lever-handle faucets are easier to operate than small twist knobs, especially for people with arthritis or reduced hand strength. Touchless faucets are another option, though they depend on batteries or electrical components and may not be the right fit for every homeowner. A simple single-handle faucet is often the most dependable choice.
Storage deserves attention here as well. Deep drawers, pullout organizers, and open shelving within easy reach can reduce bending and searching. Keep daily essentials close to the sink rather than stored high above the vanity.
7. Upgrade the toilet area for comfort and stability
Comfort-height toilets sit a few inches taller than many standard models, making them easier for many adults to sit down on and stand from. They are a popular choice in accessibility-focused remodels, though height preference is personal. A taller toilet may not be as comfortable for shorter users or young children, so it is worth testing options when possible.
Wall-mounted or side-mounted grab bars near the toilet provide added stability. Leave enough room for them in the design rather than treating them as an afterthought. A bidet seat can also improve hygiene and reduce twisting or reaching, particularly for homeowners with limited mobility.
8. Reduce thresholds and tripping points
Bathroom safety often comes down to small transitions. Raised thresholds at the entry, uneven floor changes, loose rugs, and protruding cabinet hardware can all interrupt an otherwise functional design.
During a remodel, aim for a smooth transition from the hallway into the bathroom. If flooring changes are necessary, use a low, secure transition strip. Recessed medicine cabinets, rounded vanity corners, and thoughtful hardware placement can further reduce obstacles in a narrow room.
9. Use easy-to-reach controls and storage
Controls should be simple to see and operate. Consider placing shower controls near the entry so water can be turned on before stepping under the spray. Anti-scald valves help maintain a safer water temperature, which is valuable for households with children, older adults, or anyone with reduced sensation.
Recessed shower niches keep soap and shampoo off the floor and within reach. Outside the shower, drawers with full extension make it easier to access items at the back. These details may seem minor during planning, but they make a real difference in the finished bathroom.
10. Plan for the future without overbuilding for it
Not every home needs every accessibility feature. A hall bathroom used mainly by children will have different priorities than a primary bathroom intended for long-term aging in place. The strongest design balances present-day function, future flexibility, and the home’s overall character.
For example, you might choose a curbless shower and add wall blocking for future grab bars, while postponing a full wheelchair-accessible vanity until it is needed. This approach keeps the room attractive and practical today while avoiding expensive changes later.
Work With a Remodeling Team That Sees the Full Picture
Accessibility upgrades involve more than choosing fixtures. They can affect plumbing locations, framing, waterproofing, electrical work, ventilation, flooring transitions, and storage design. Coordinating those details early helps prevent costly surprises and ensures that each improvement works with the rest of the room.
At JG Home Services, we help homeowners turn functional needs into bathroom designs that feel intentional, comfortable, and built to last. From the first consultation through material selection and installation, a detailed plan keeps the project focused on your goals, schedule, and budget.
The right bathroom changes are the ones that make daily routines feel easier without calling attention to themselves. Start with the areas that create the greatest risk or frustration, then build a space that supports your household with comfort, confidence, and lasting craftsmanship.