
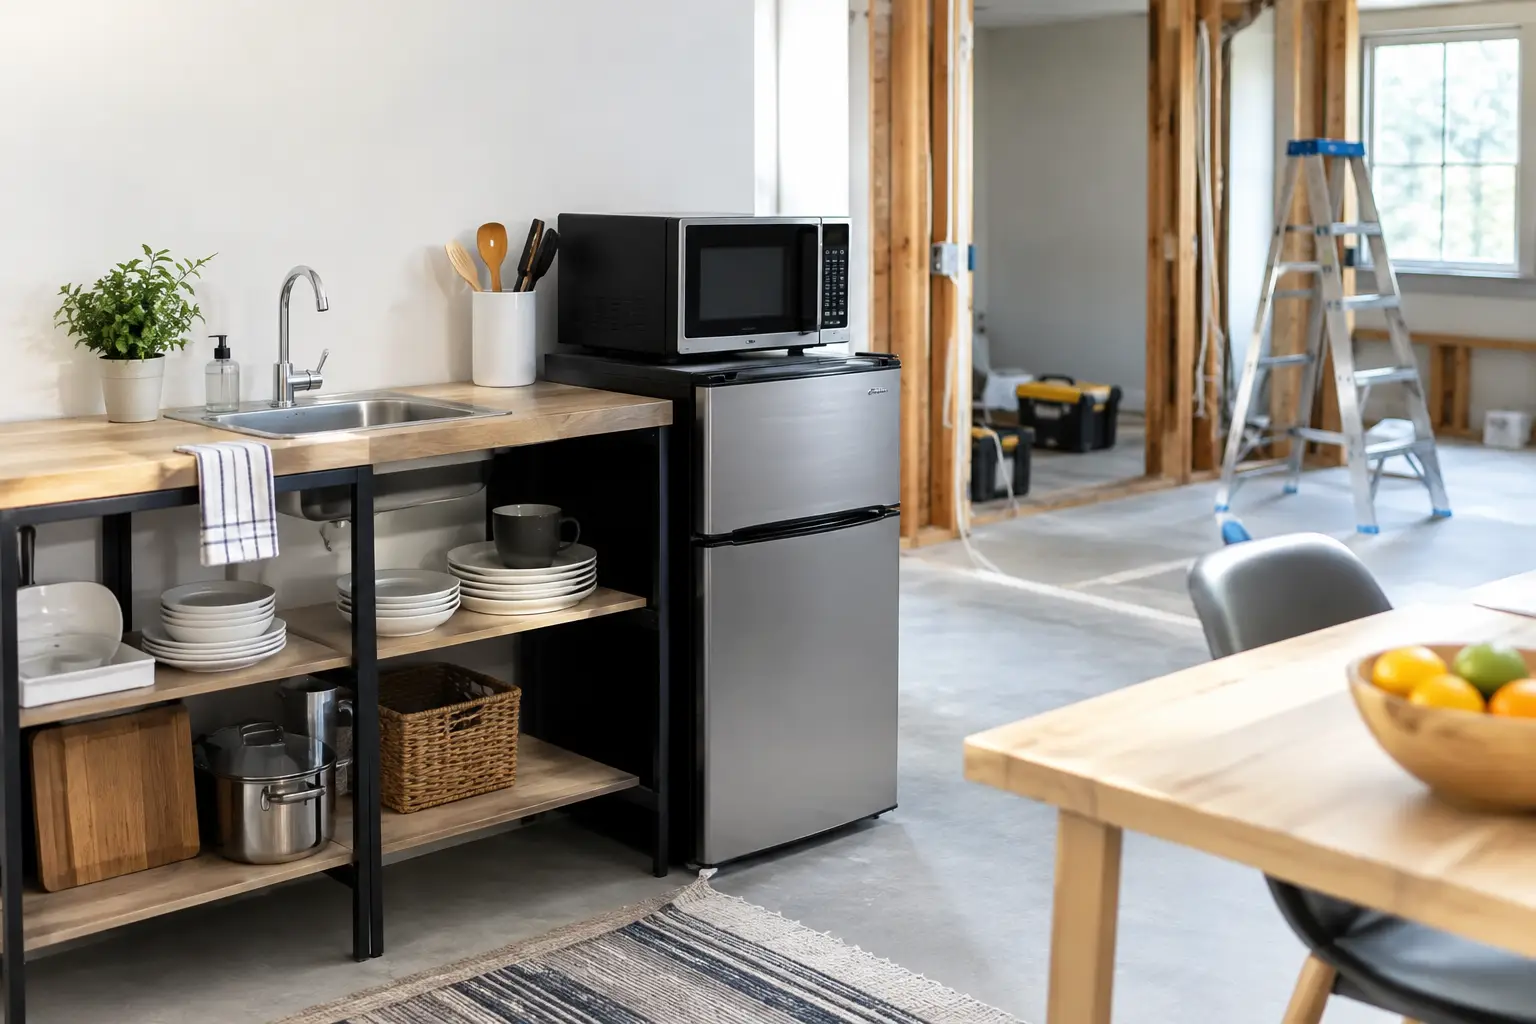
A kitchen remodel changes the way your home works long before the new cabinets or countertops are installed. The refrigerator may be moved, the sink may be unavailable, and daily meals can quickly become expensive and frustrating without a plan. This temporary kitchen setup guide helps you create a workable space that keeps your household fed, organized, and comfortable while your renovation is underway.
The goal is not to recreate your full kitchen in another room. It is to establish a clean, safe, and realistic meal station that supports your family’s routine for the length of the project. A little preparation before demolition begins can prevent many of the disruptions homeowners worry about most.
Temporary Kitchen Setup Guide: Start Before Demolition
The best temporary kitchens are planned during the remodeling consultation, not after workers have removed the old cabinets. Ask your contractor which appliances will remain accessible, where dust barriers will be placed, and whether water or electrical service will be temporarily interrupted. The answers affect where you set up and what equipment you need.
Choose a location outside the construction path. A dining room, basement, laundry area, finished garage, or covered patio can work well, depending on the season and layout of your home. Prioritize a space with easy access to an outlet, enough room for food storage, and a route that does not require walking through an active work area.
Keep the setup close enough to daily life that it will actually get used, but far enough away that construction dust, noise, and worker traffic do not interfere with meal preparation. For families with young children or pets, separation matters even more. A temporary kitchen should never create a reason to enter a restricted renovation zone.
Before the project starts, clear out a cabinet or closet near your temporary station for essentials. Store only the items you expect to use regularly. Packing every utensil, spice, and small appliance into the temporary space creates clutter and makes cleanup harder.
Build Around the Appliances You Will Really Use
A temporary kitchen does not need a full collection of countertop appliances. In fact, too many devices on one circuit can cause inconvenience or create a safety concern. Start with the equipment that matches how your household actually eats.
For many homeowners, a refrigerator, microwave, coffee maker, electric kettle, and slow cooker or air fryer cover most daily needs. An induction cooktop can be useful when there is no access to a range, but it should be used on a stable, heat-resistant surface and only with compatible cookware. A toaster oven is another flexible option for simple reheating and small meals.
If you are setting up in a basement, garage, or another area without a nearby sink, plan for dishwashing in advance. A utility sink may be available, but if not, use a wash tub and a separate rinse tub, then sanitize and dry dishes completely. It is often easier to use a limited set of reusable dishes supplemented by compostable plates and bowls during the busiest stages of construction.
Be realistic about electrical capacity. Avoid plugging a microwave, hot plate, coffee maker, and air fryer into the same power strip. Use grounded outlets, follow appliance instructions, and keep cords away from walkways and water. If your contractor recommends a dedicated temporary power arrangement, treat that as a worthwhile safety measure rather than an optional extra.
Keep Cold Food Storage Simple
If your refrigerator can remain in place and accessible, that is usually the easiest solution. If it must be moved, decide whether a second refrigerator, compact unit, or cooler system makes sense for your family. A larger household may need additional cold storage, while a couple may prefer to buy smaller quantities of groceries more often.
Put a thermometer in any cooler or temporary refrigerator. Perishable food needs to stay cold, and guessing is not a reliable food-safety plan. Keep raw meat separate from ready-to-eat foods, and do not overload a compact refrigerator to the point that air cannot circulate.
Create Zones for Food, Prep, and Cleanup
Even a small temporary kitchen works better when it has clear zones. Assign one surface for food preparation, one area for appliances, and one location for clean dishes and dry goods. This approach reduces clutter and helps everyone in the household know where things belong.
A folding table, rolling cart, or sturdy utility shelf can become the center of the setup. Cover unfinished surfaces with an easy-to-clean material, especially if children will be helping with snacks or meals. Keep paper towels, disinfectant, dish soap, trash bags, and hand sanitizer within reach.
Your food storage should be equally intentional. Use clear bins or labeled containers for breakfast items, lunch supplies, snacks, and cooking staples. Store pantry goods away from construction dust, moisture, and direct sunlight. A lidded bin is especially useful in a garage or basement, where open food packages can attract pests.
Do not overlook the trash plan. Remodeling creates its own waste stream, and your family’s food waste should stay separate from construction debris. Place a covered trash can near the temporary kitchen and empty it frequently. This simple step keeps odors and pests from becoming an avoidable problem.
Plan Meals for the Realities of Remodeling
A renovation is a temporary inconvenience, but it can feel much longer when every dinner becomes a last-minute decision. Plan a short rotation of meals your household enjoys and can prepare with your available appliances. Think breakfast sandwiches, oatmeal, yogurt, salads, rotisserie chicken, slow-cooker soups, pasta made with an electric burner, or reheated freezer meals.
This is also a good time to prepare a few meals before the project starts. Freeze casseroles, cooked proteins, soups, and sauces in family-size portions. Label each container with the date and reheating instructions. Having several reliable meals ready for the first week can take pressure off when the schedule is at its busiest.
Takeout can be convenient, but relying on it every night can strain the budget and make the process feel less controlled. Build it into the plan instead. Choose one or two nights a week for restaurant meals or delivery, then use simple home-prepared options the rest of the time.
It depends on the length and scope of your remodel. A two-week refresh may only require a coffee station and microwave meals. A larger kitchen renovation involving layout changes, plumbing, electrical work, or new flooring deserves a more complete temporary setup. Your contractor should provide a clear project schedule so you can plan around key milestones and any periods when access will be limited.
Protect Your Home and Your Routine
Construction dust has a way of traveling farther than expected. Keep temporary kitchen items in closed containers, and wipe down surfaces regularly. If your setup is near the work area, ask how the renovation space will be contained and what daily cleanup procedures are planned.
Maintain a clear path from your temporary kitchen to the bathroom, bedrooms, and exterior doors. Do not store bins, extension cords, or small appliances where they create trip hazards. If your home includes elderly family members, children, or pets, make the route as simple and open as possible.
Communication also protects your routine. Let your remodeling team know about school schedules, work-from-home calls, medical needs, or times when the household requires quieter access. A professional contractor cannot eliminate every disruption, but clear expectations allow the team to manage the project with greater care and keep you informed when conditions change.
Pack the Kitchen With Reopening in Mind
As you pack, label boxes by category and by priority. Mark items such as everyday dishes, bakeware, entertaining pieces, and seasonal appliances separately. Keep the tools you will need when the new kitchen is ready – scissors, box cutters, cleaning supplies, shelf liner, and a basic screwdriver – in one clearly marked bin.
Photograph the contents of specialty drawers or cabinet organizers before packing them. This can make it easier to decide where items belong when the renovated kitchen is complete. It also gives you an opportunity to leave behind duplicates, damaged cookware, and items you have not used in years.
A well-managed remodel should feel organized from the first planning meeting through the final walkthrough. At JG Home Services, careful preparation, clear communication, and detailed execution help homeowners focus on the excitement of a finished kitchen rather than the inconvenience of living through the work.
Your temporary kitchen only needs to serve one purpose: make daily life manageable while the permanent space takes shape. Set it up thoughtfully, keep meals simple, and give your household permission to operate differently for a few weeks. The payoff is a kitchen designed around how you truly live.